Blush is an essential item that should always be integrated into one’s beauty routine. You may think you could do without the rouge but you’d be surprised of what it could do for your complexion. If you wear foundation (like I do), you will want to know that although foundation evens your skin tone, it makes you look quite flat and two-dimensional at the same time. To combat looking “flat-faced”, one must use blush. A lot of people will forgo applying blush on a day-to-day basis for a variety of reasons. People with a ruddy complexion may think that it makes your face redder. Newcomers to blush may be unsure how one would apply this blush (fingers, brush, etc.) and what kind of formula to use (powder, stains, jellies, cream, etc.). Minimalists may see this as an excessive step to their five-minute makeup routine. I stress the usage of blush because I’ve seen what it can do to people. Just a wash of color on the cheeks can make people look younger, change a face shape, and it literally makes people look more alive and inviting. I admit, I didn’t start using blush until my college years and if I had known when I was a lot younger, I think my yearbook photos would’ve come out a lot better. I’ve always had blushers; I just never used them.
You Can’t Love Blush without the Orgasm
NARS makes some of the best blushes out there and their bestselling one goes by the name of “Orgasm”. The name of this blush is so tongue-in-cheek and it is “the” blush to have. It provides the wearer with a sheer wash of shimmery peachy pink. The thing I love about blushes from NARS is that they are well-made and very pigmented (and complex). MAC makes very pigmented blushes too but I honestly find them to be flat and too dry in general. A light wash of Orgasm will give you that definitive glow that lasts all day. This shade actually works for a wide range of complexions. I even have the Illuminator in Orgasm (although I want to get Super Orgasm as well).
All the Types of Blush
Blush is honestly very complex (even more complicated than lipstick) because it comes in a variety of formulations and there are countless ways to apply it. With this in mind, it’s harder for the people who are trying to avoid looking like a clown. It happens when you don’t know what you’re doing and when you’re too “blush-happy”. Lately, I’ve simplified my cheek routine but I can honestly say that it involved an illuminator, a powder blush, a mousse blush and a highlighter. The finished result is stunning and beautiful but I don’t want to do that everyday, you know? The different types and finishes of blush can do a myriad of things.
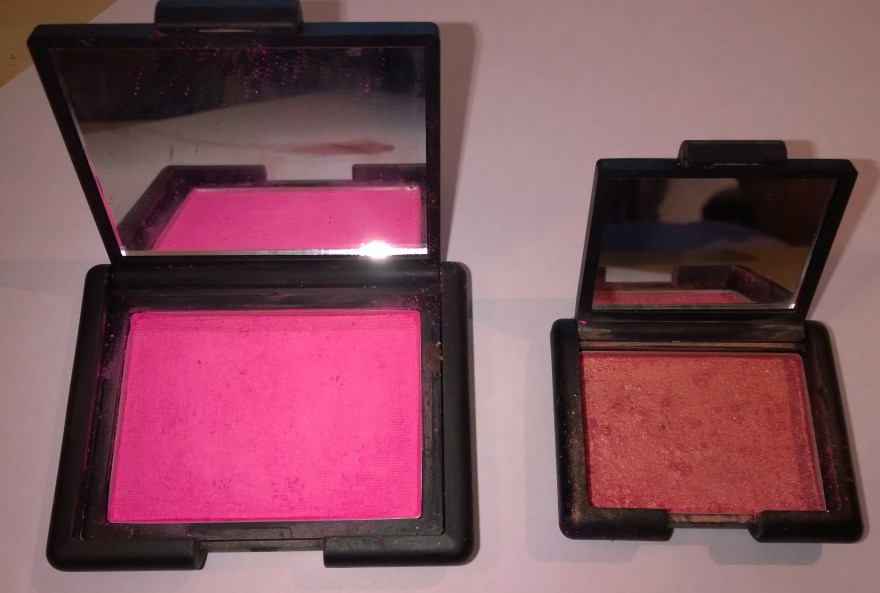
- Powder blush doesn’t necessarily mean a matte finish. It can provide shimmery and satin finishes as well. Powder blush just means that it’s either a pressed blush or a loose one (just like face powders). You’ll definitely want to use a blush brush because the natural oils that are on your fingers break down the product. You just end up wasting product and your blush will develop a crust that you’ll have to scrape off. I recommend using an angled blush brush for your cheekbones and using a tapered, dome-shaped blush brush for the apples of your cheeks (mind you, you’ll have to make adjustments depending on your face shape). Always tap off any excess to avoid looking like Raggedy Ann. I find that if you have an oilier skin type that powder blushes will be ideal because it has more staying power. It is also advisable to use powder blushes during the summer. Powder blushes are the most common form and you’ll find various brands offer powder blush such as NARS, Dior, Maybelline, Covergirl, etc. The two shown here are both from NARS (Desire on the left and Orgasm on the right).
- Cheek stains (tints) are made to last. This formulation is a double-edged sword because it’s a great option for anyone who sucks at application because the instructions seem so simple. It’s easy to blend and the directions will tell you (most of the
 time) to just apply a small amount to your cheeks and blend. Sounds easy, doesn’t it? They never mention that if you like to take you sweet time with application or if you don’t know the anatomy of your face in general, that it’s going to be a pain. It’ll be a bigger pain when you mess up, try to take it off, and realize that it really does what the name says: it stains. Cheek stains provide a sheer wash of natural-looking color and it’s buildable. I wouldn’t say it’s for everyone though. The staying power of stains are phenomenal and its something you’ll bust out on those hot summer days or when you’re in a morning rush. Benefit makes a very popular cheek and lip stain called Benetint. It literally looks like a bottle of nail polish and the applicator brush resembles a nail polish brush as well. Other brands that make cheek stains are Hourglass and Tarte.
 - Illuminators/Highlighters are a category of their own in my opinion. These cosmetics are usually flesh tone or stark white/pink. NARS makes an illuminator that doubles up as blush and a highlighter as well. It comes in 7 shades and came be used under, in, and over foundation. The shade I own is Orgasm and I used it to create a base for my blush. There are other shades from NARS that can be used as bronzers and highlighters. It has a very light gel consistency and it is easily layered and blendable. I usually use my fingers or a dome brush to blend the Illuminator in. The highlighter I am currently using is the highlighting creme duo from Anastasia. I use a lot of Anastasia brow products but their highlighter is a great product as well. It has a thicker consistency and feels very much like a cream. A little really goes a long way. Highlighters should always be used sparingly because you can easily end up looking a disco ball if you are not careful. I dab a few dots on my cheekbones, my cupid’s bow, my brow bones and down the tip of my nose. Blend and blend but keep the product on those areas so that you don’t end up highlighting areas you don’t want to highlight.


- Cream blushes are second to powder blushes when it comes to what is mostly offered on the market. Like powder blushes, cream blushes are extremely versatile. They are easy to apply (you can use your hands or a brush), the coverage is buildable, and provides a more multi-dimensional finish. Cream blushes are great for drier skin types, anyone who likes illumination, and helps to hydrate the skin during the colder months.
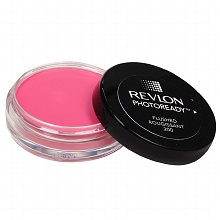 Cream blushes do tend to come off easier on oilier skin types and during the summer as well. Cream blushes require less product and the amount you use is much more easily measured and controlled. You waste less product in the long run despite its lower staying power than the other types of blushes although you can powder your face beforehand to combat cream blush’s short staying power. Make Up Forever makes a beautiful blush called HD Microfinish Blush that blends in seamlessly. Other blushes to check out are Clinique’s Blushwear Cream Stick (it’s a cream-to-powder blush), Revlon’s PhotoReady cream blush and Illamasqua’s Cream Blusher.
 - Gels, Jellies, Gelées, etc. These categories are quite complex and half of the time, they are a mixture of different types of blushes. Gels typically come in a tube while jellies/gelées come in a pot. They are extremely easy to apply but you must work fast. Their staying power rivals the powder blushes and they are offered in different amounts of pigmentation (from sheer washes of color to a highly-pigmented tar). These relatively new formulations are packed with hydrating ingredients and are mostly water-resistant. I am currently using a gelée at the moment. It’s the Coconut Watercolor Cheek Gelée by Josie Maran in Pink Escape. The gelée stays on all day but I found that it’s harder to apply on drier skin types and that using my fingers would be a huge no-no. To avoid messing up my foundation and other products I’ve applied to may face, I use a stippling brush to lightly apply the gelée. It’s a lot cleaner as well as I find that the gelées can easily stain your fingers. Also, be sure to apply your face products first before applying gels, gelées, etc. (this should be your last step).


Overall, I think blush is a product that can really bring life to your look. I believe that even if you are running late, always try to do your eyebrows, sweep some blush on and put some color on your lips. You don’t always have to look polished and all finished up but blush really does make all the difference. Just a quick sweep of it across your cheeks and you’ll look healthier and energized. I hope this article has been helpful and will inspire you to try blush or even reconsider it if you’ve written it off. Happy reading!