I’ve got a pretty old home but the good thing about being a homeowner is being able to customize and update your home if you don’t like the way it currently is. I bought a house about a month ago and so far, I’ve painted some rooms and I’ve changed some lighting fixtures as well. I still have a lot to do but today I decided to check out the Adorne switch system by Legrand.
I painted my current office to the color, Palisade Blue, by Valspar and despite how beautiful the color was, the old wooden light switch was a sight for sore eyes. I was determined to change the light switch.
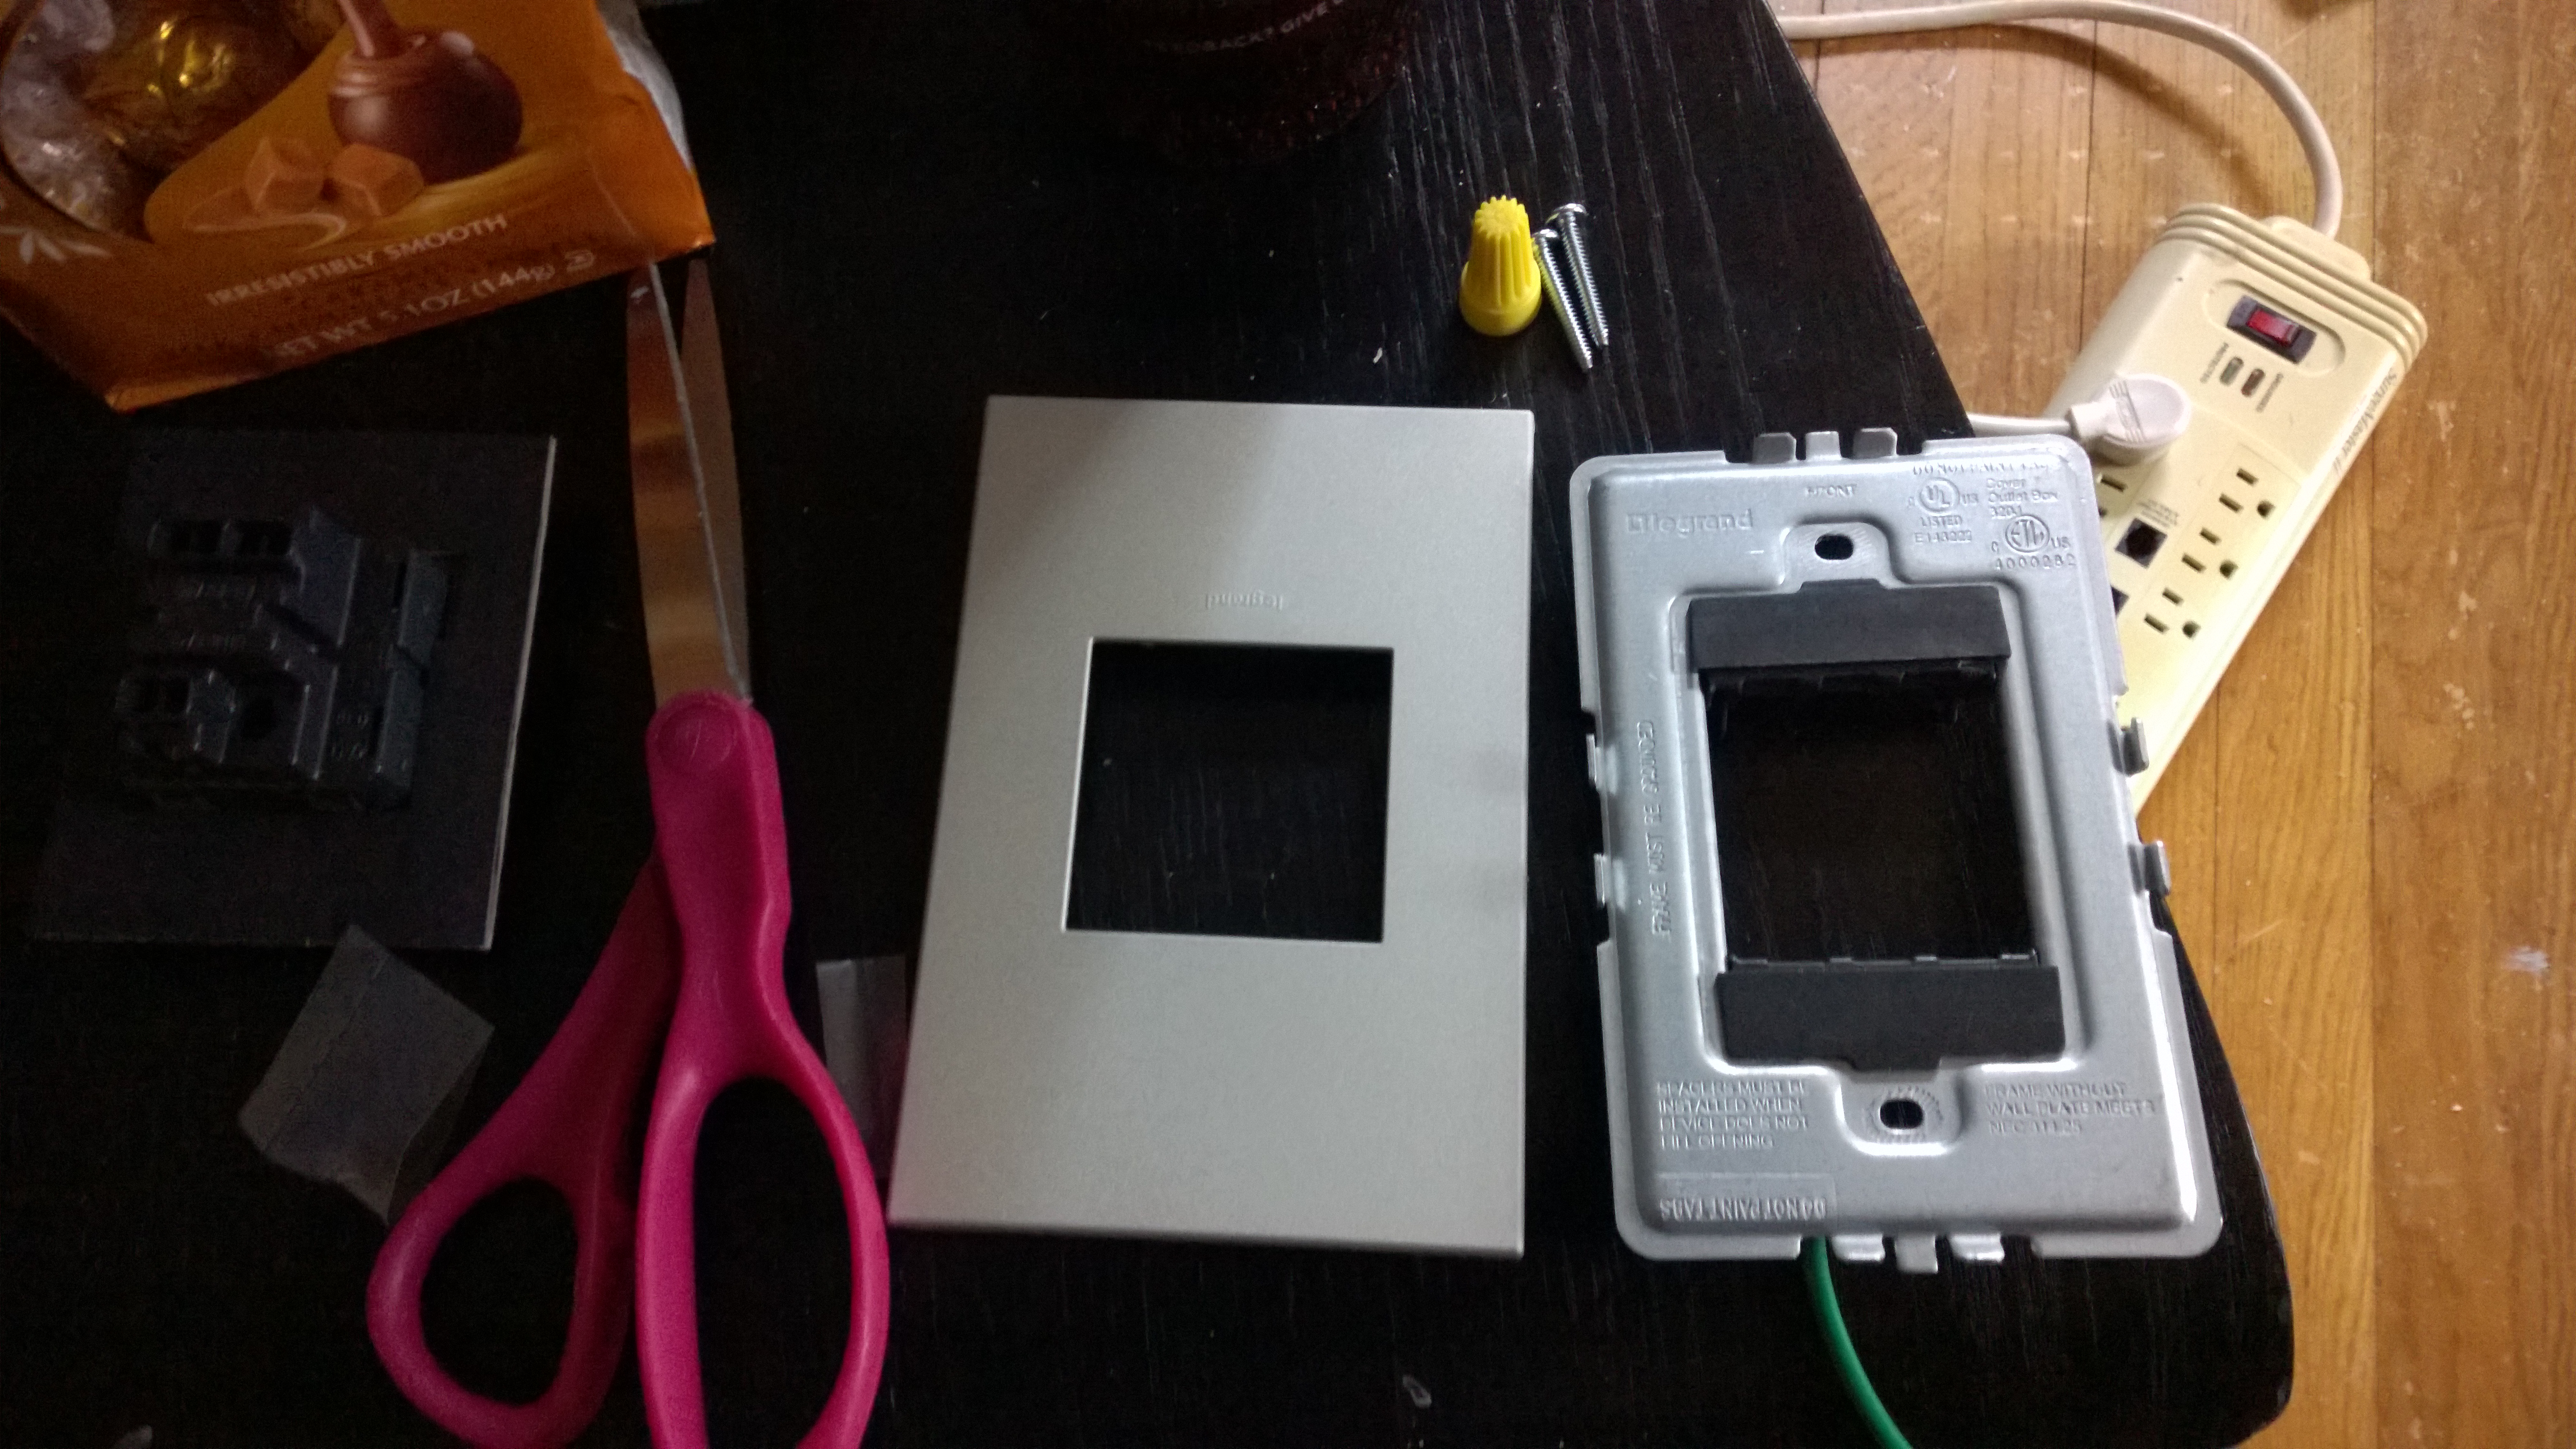
I’ve been looking at the Legrand system and I decided to pick up the Paddle light switch in Magnesium (they also have this switch in white) and I got the gang plate in Titanium. I wanted to get the Satin Nickel gang plate and the Touch switch (this is an amazing light switch) but for the sake of trying something new, I decided to get the more affordable options just in case I didn’t like the finished result. I got both the light plate cover and Paddle light switch for under $13 at Lowe’s.

I’ve changed light fixtures in the past so I figured the principles would generally be the same.
So here comes the how-to part (note: the color of the photos are a bit off since I was working during sundown):
1. Disconnect power from the breaker before you begin so you don’t end up electrocuting yourself.
2. Unscrew the old gang plate (light switch plate cover) from the wall.


3. Pull the old light switch towards you and disconnect the wires from the terminal holes. You’ll typically find three wires. For this DIY project regarding a one-way switch and not a three-way, we’re going to be focusing on the black and the red wire.
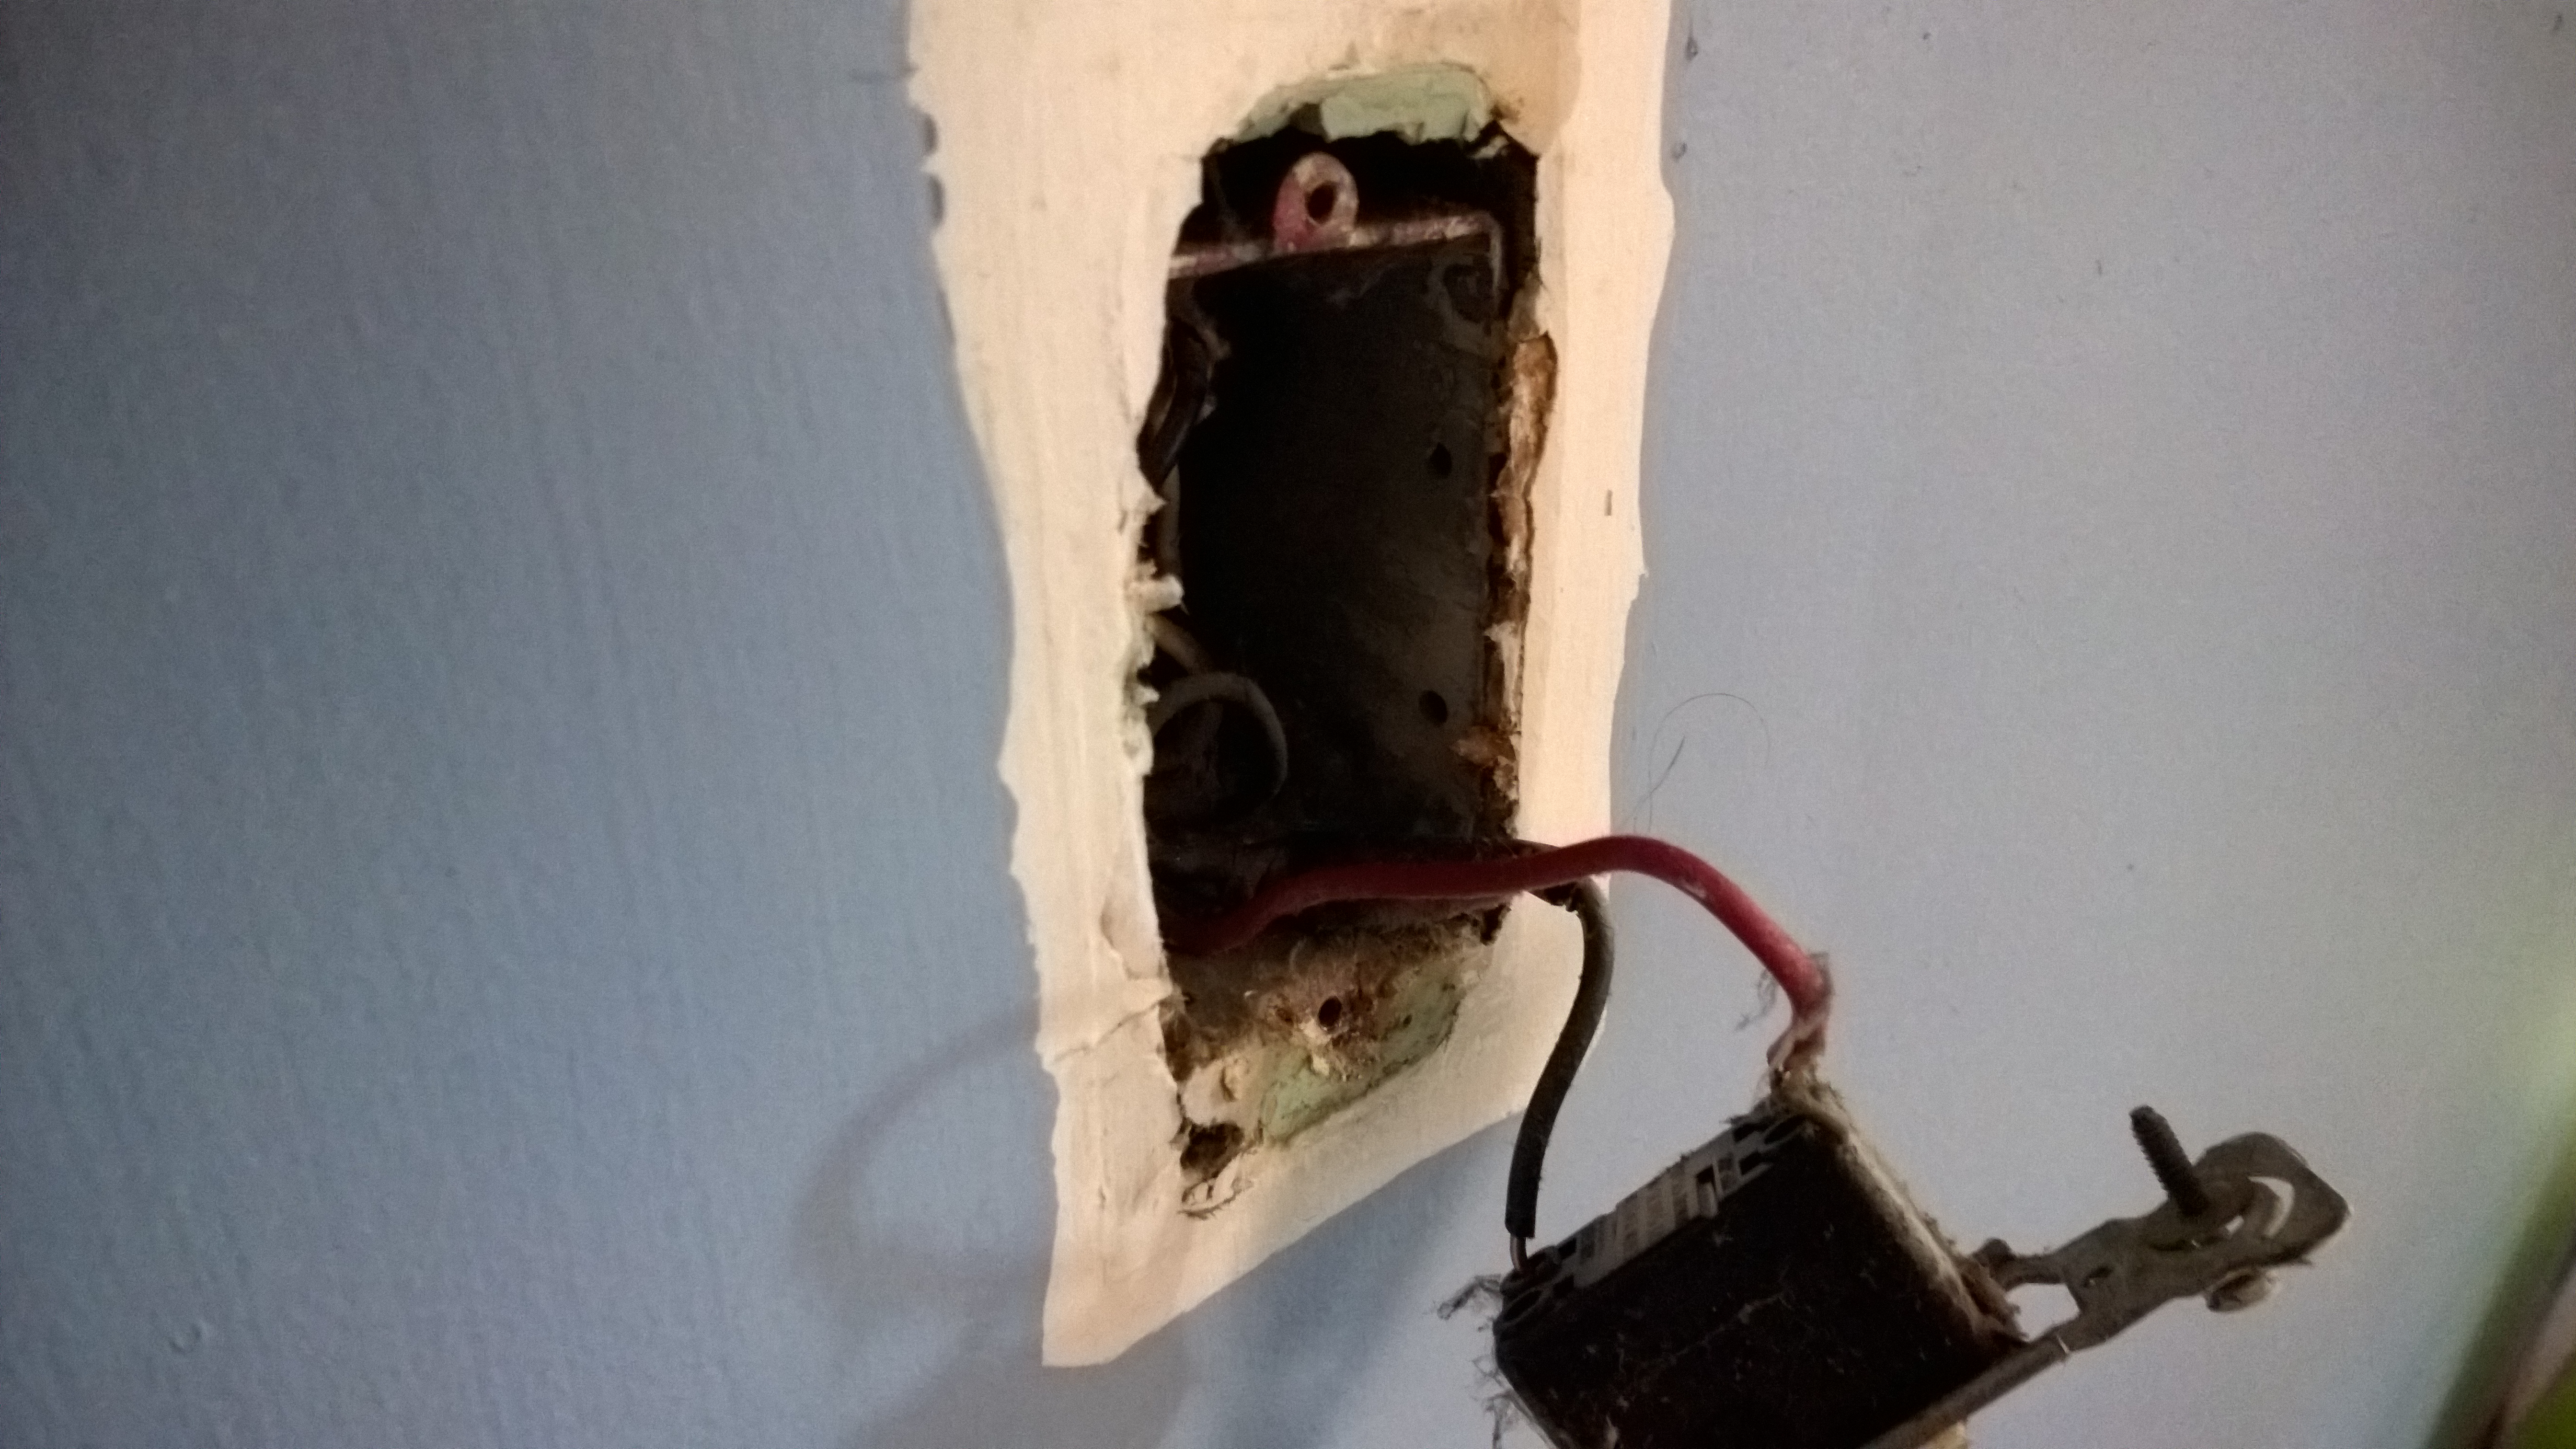
* if the wires do not come out of the terminal, you can also cut them and then use a wire stripper to reveal more usable wire.
4. Unsnap the gang plate cover from the metal frame of the new gang plate. Mount the metal frame to the wall where the old gang plate was with the two provided screws. Be sure not to over-tighten.
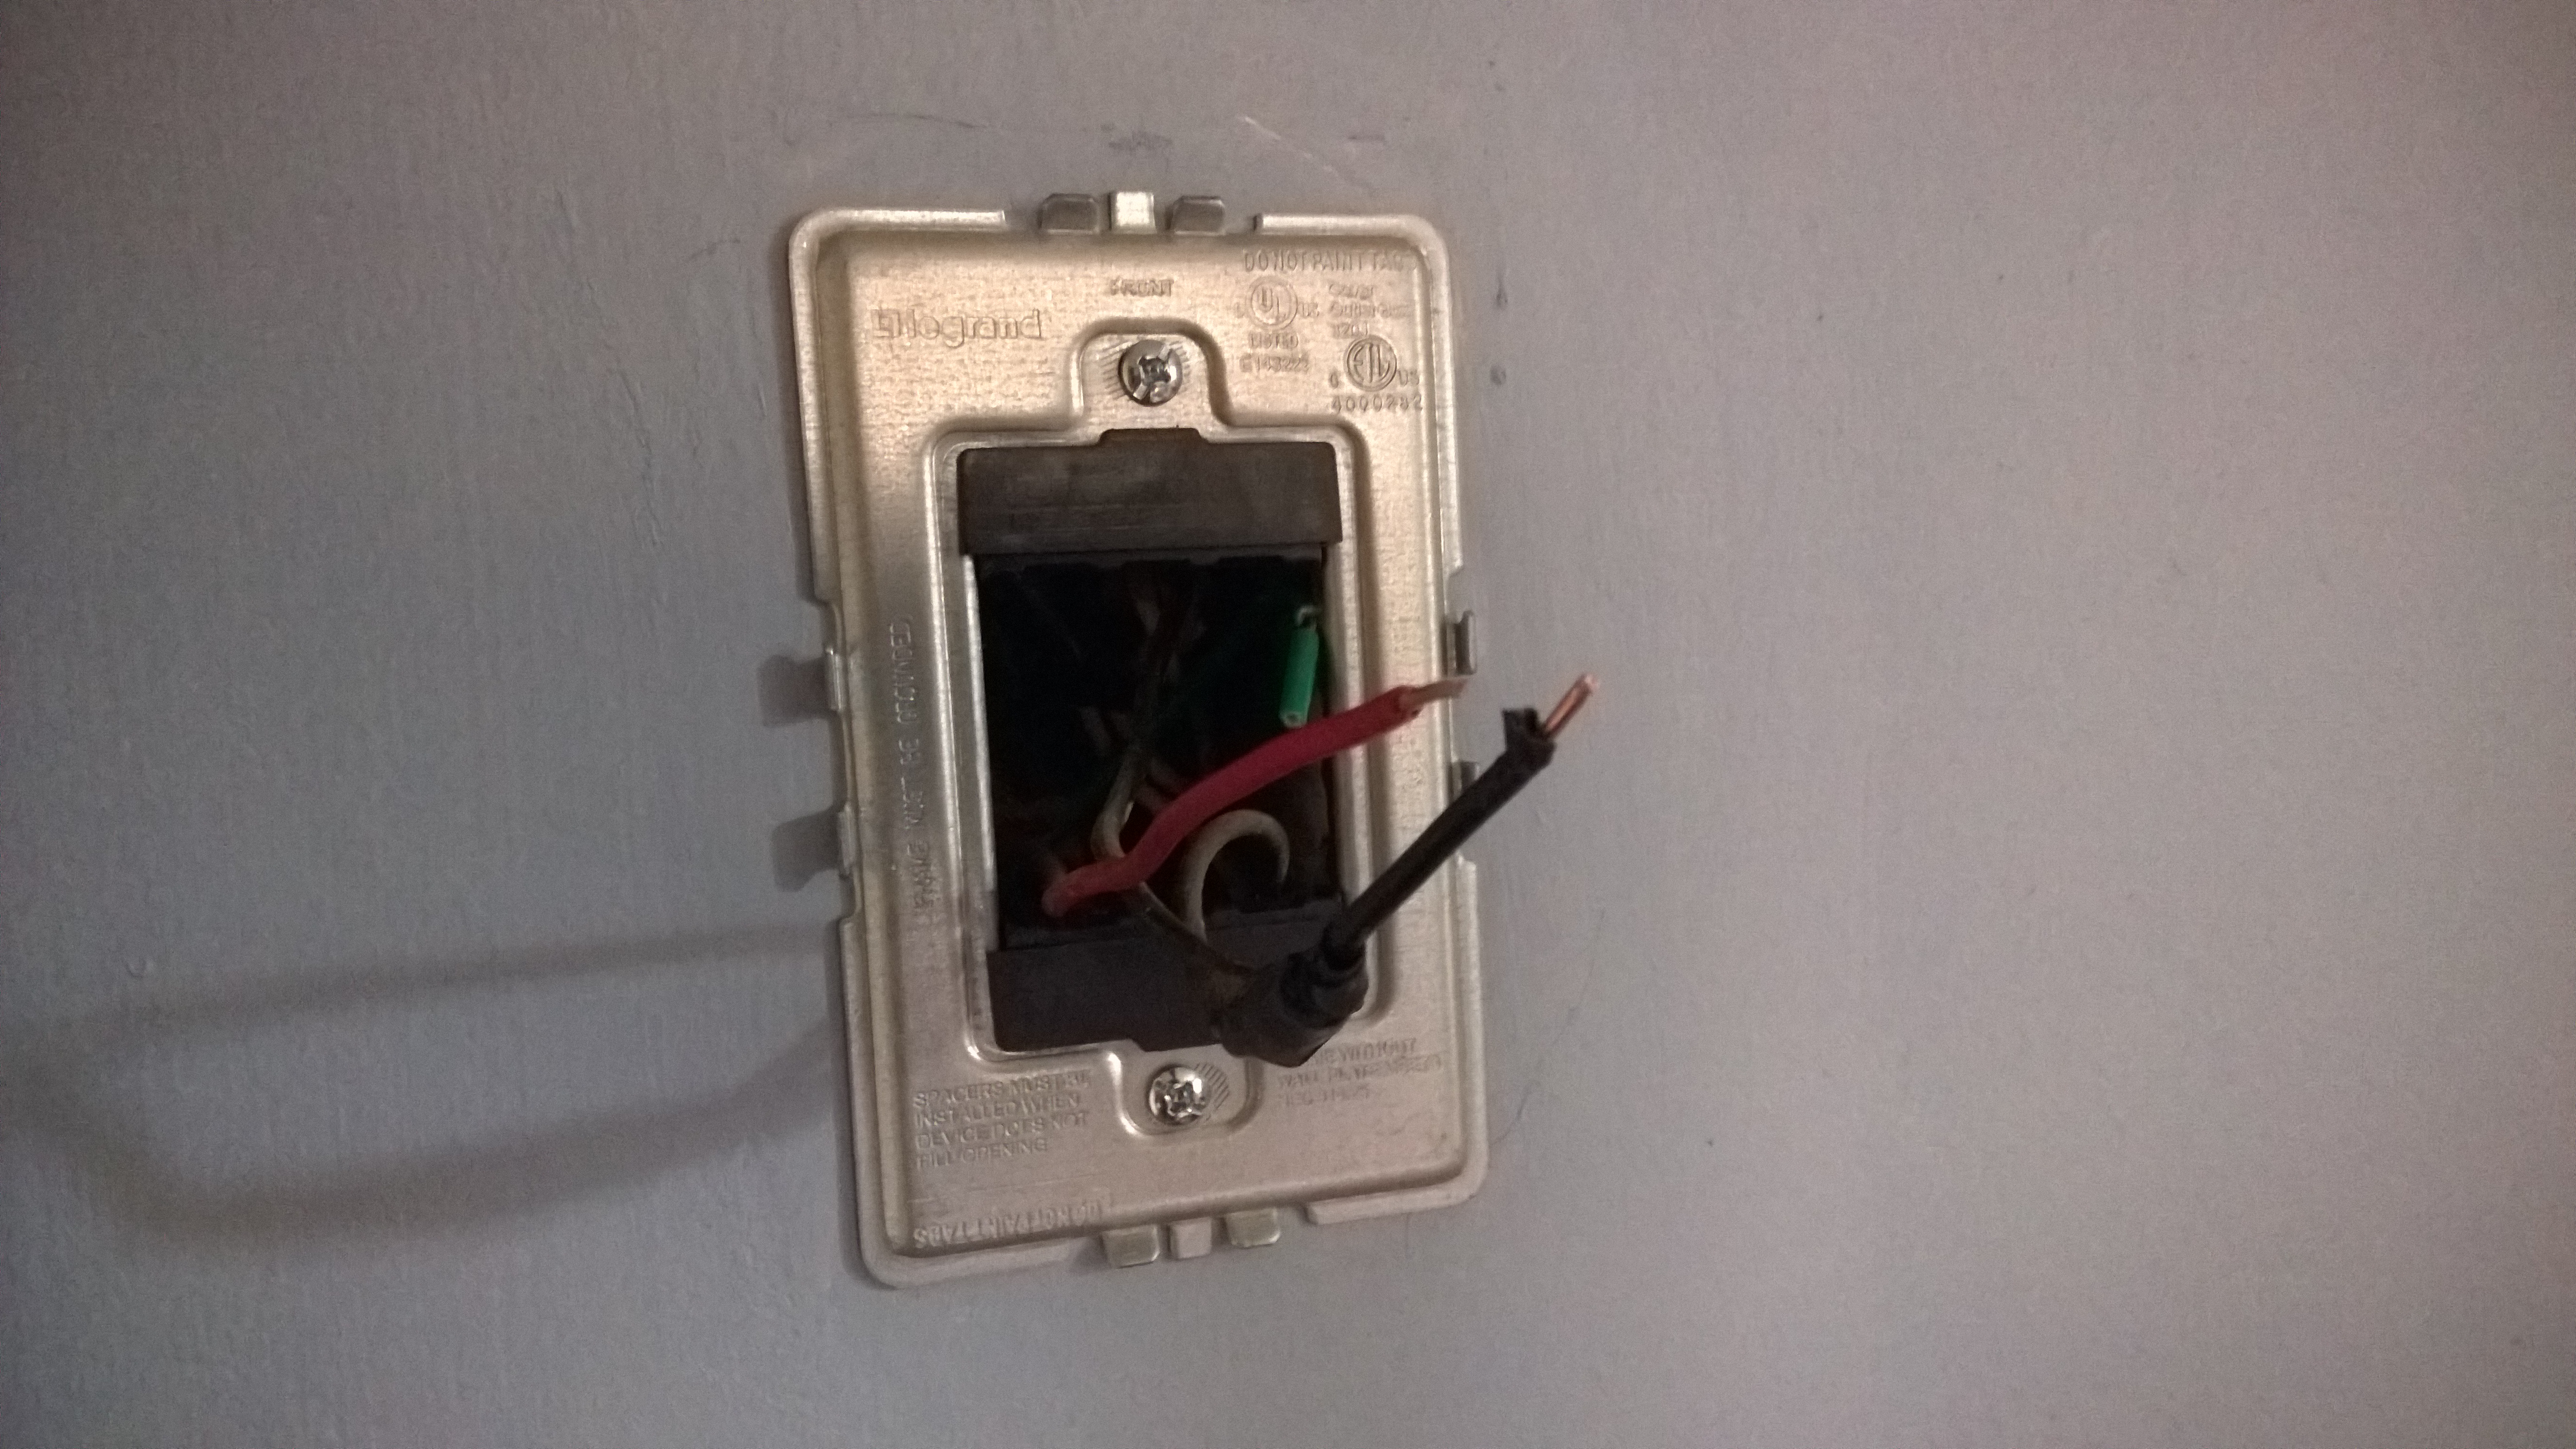
5. Insert the one wire into the 1-pole terminal of the new electrical switch (Paddle) and use a screwdriver to tighten the screw at the top of that terminal to secure the wire. Insert the other wire into the HOT terminal and secure the wire in the terminal as well. (my home is wired insanely weird so in a sense, everything is backwards regarding wire colors. Be sure to use a circuit checker if you are having difficulty identifying which wire is hot.)
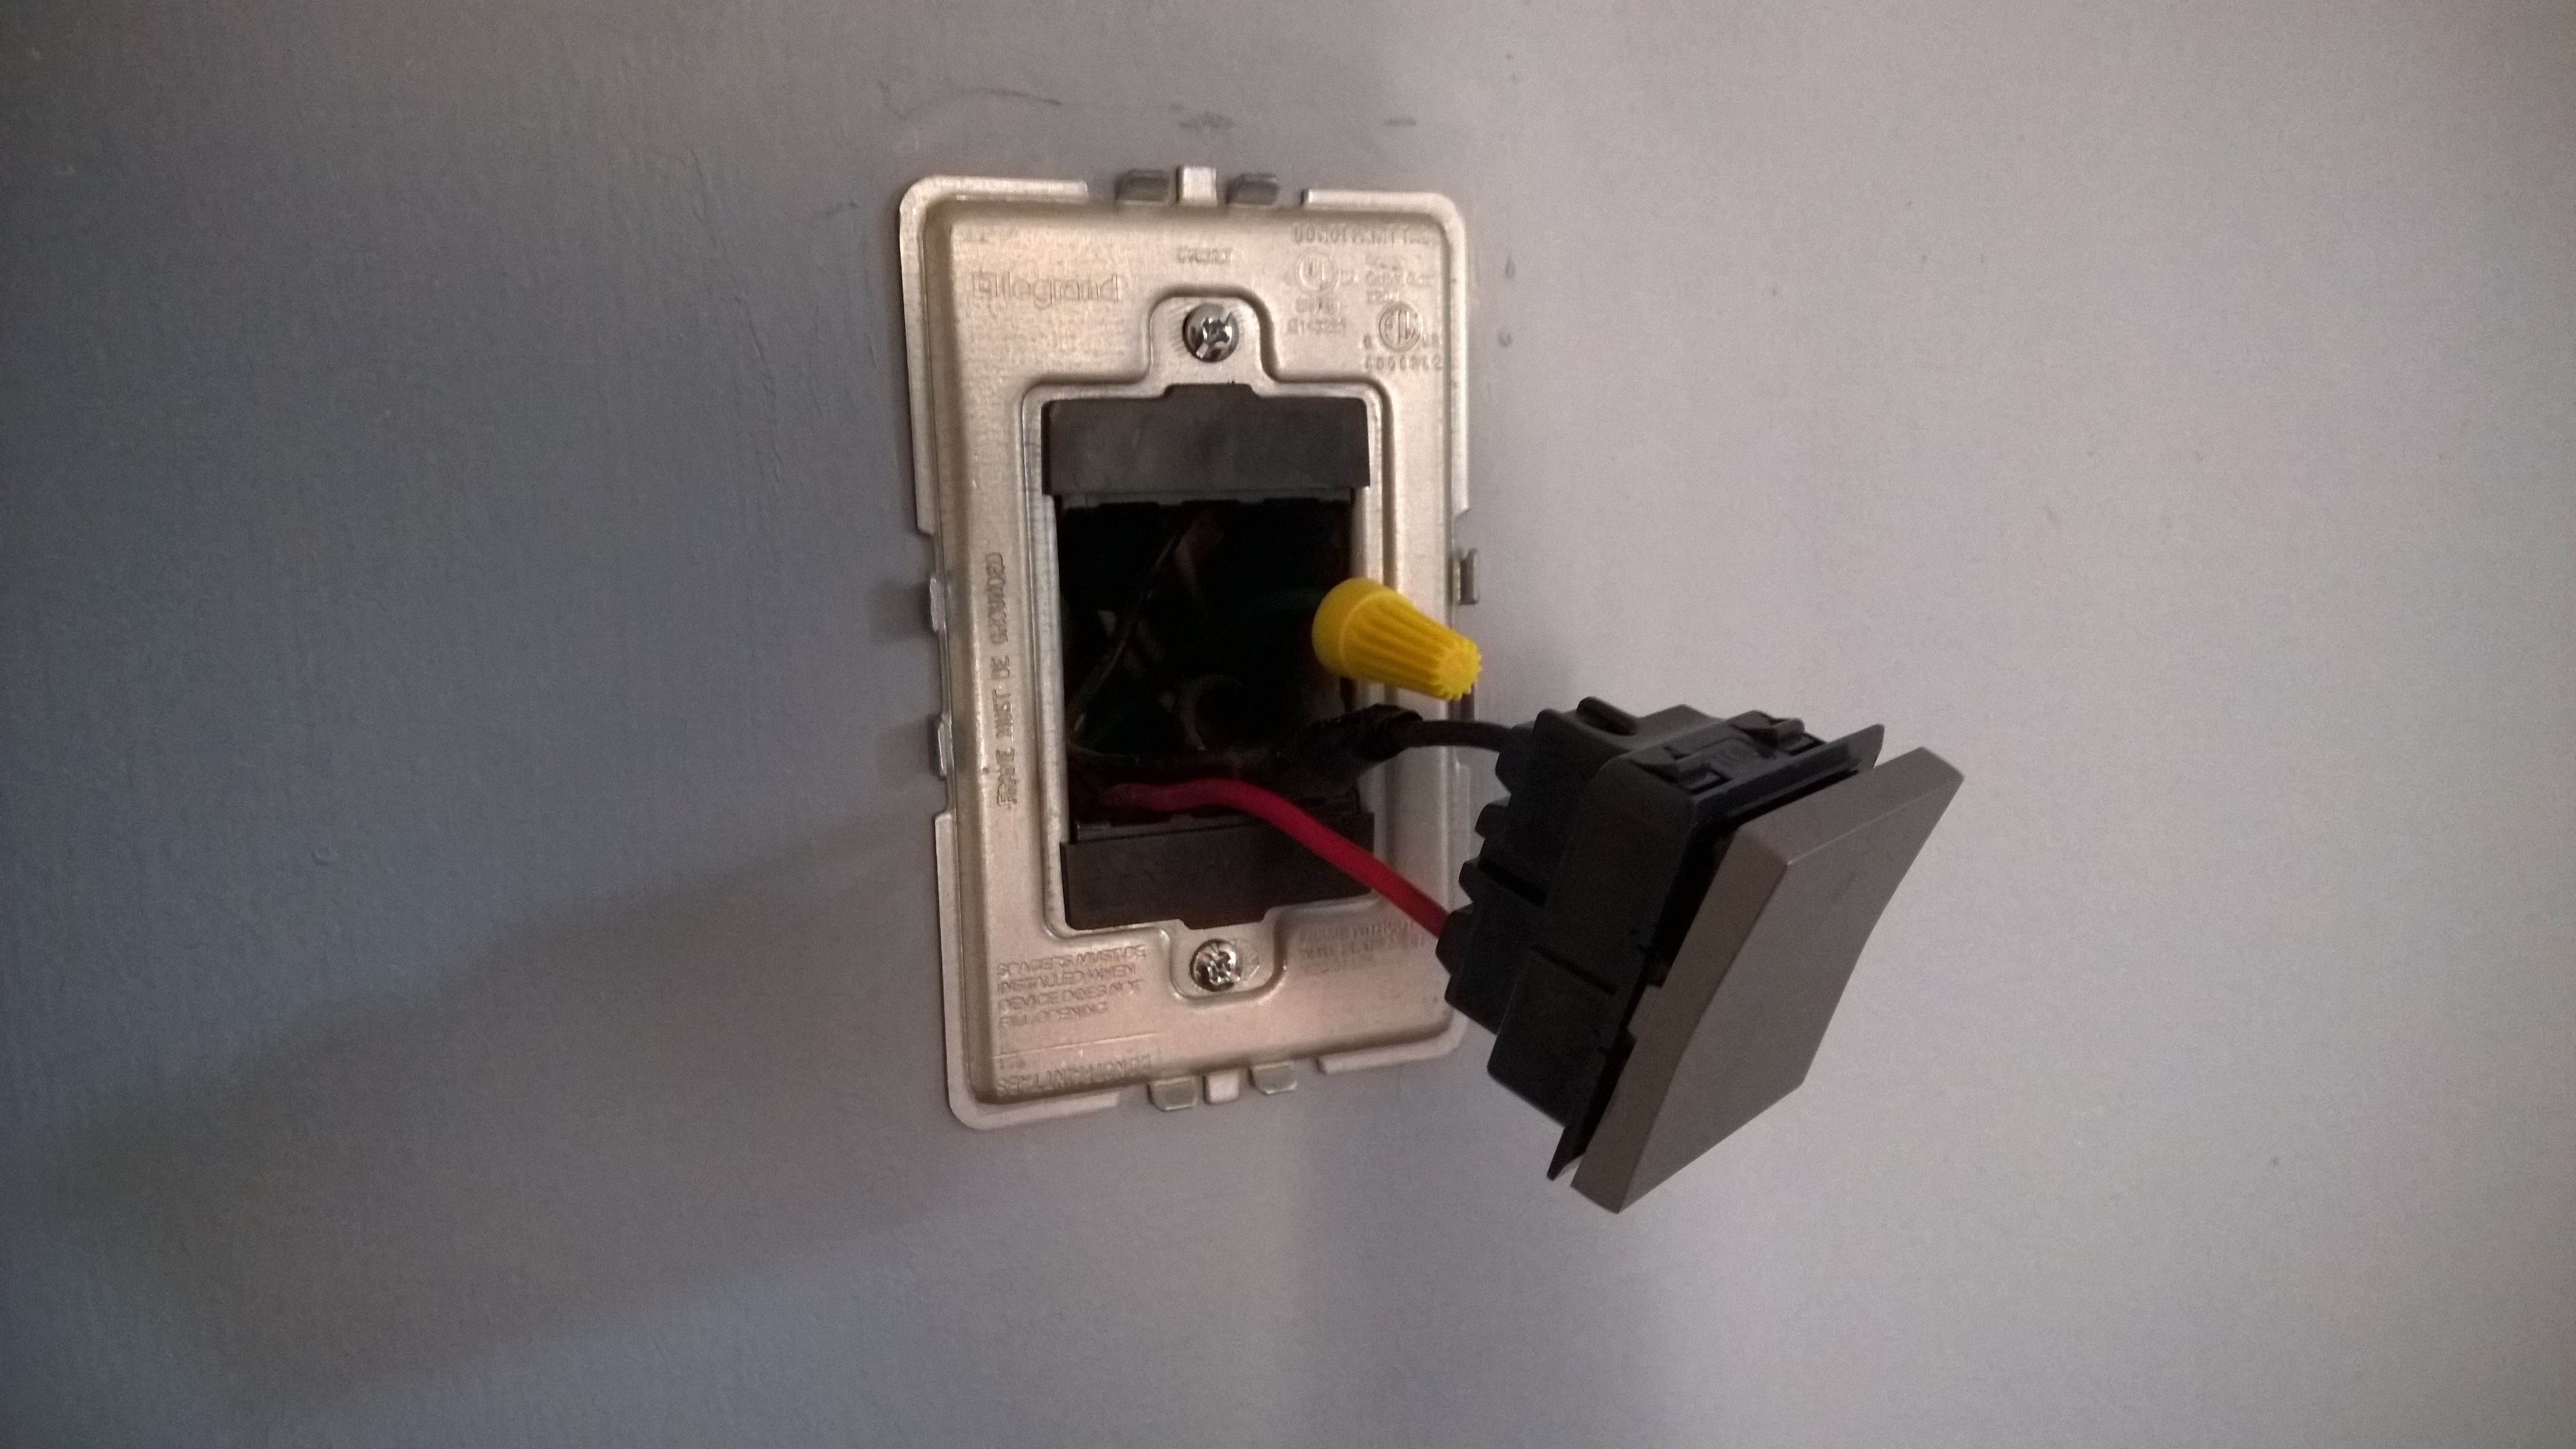
6. Ease the electrical switch back towards the wall and snap the switch into the gang frame.
7. Snap the wall plate cover to the metal frame. You will hear three audible clicks meaning the cover is secure.

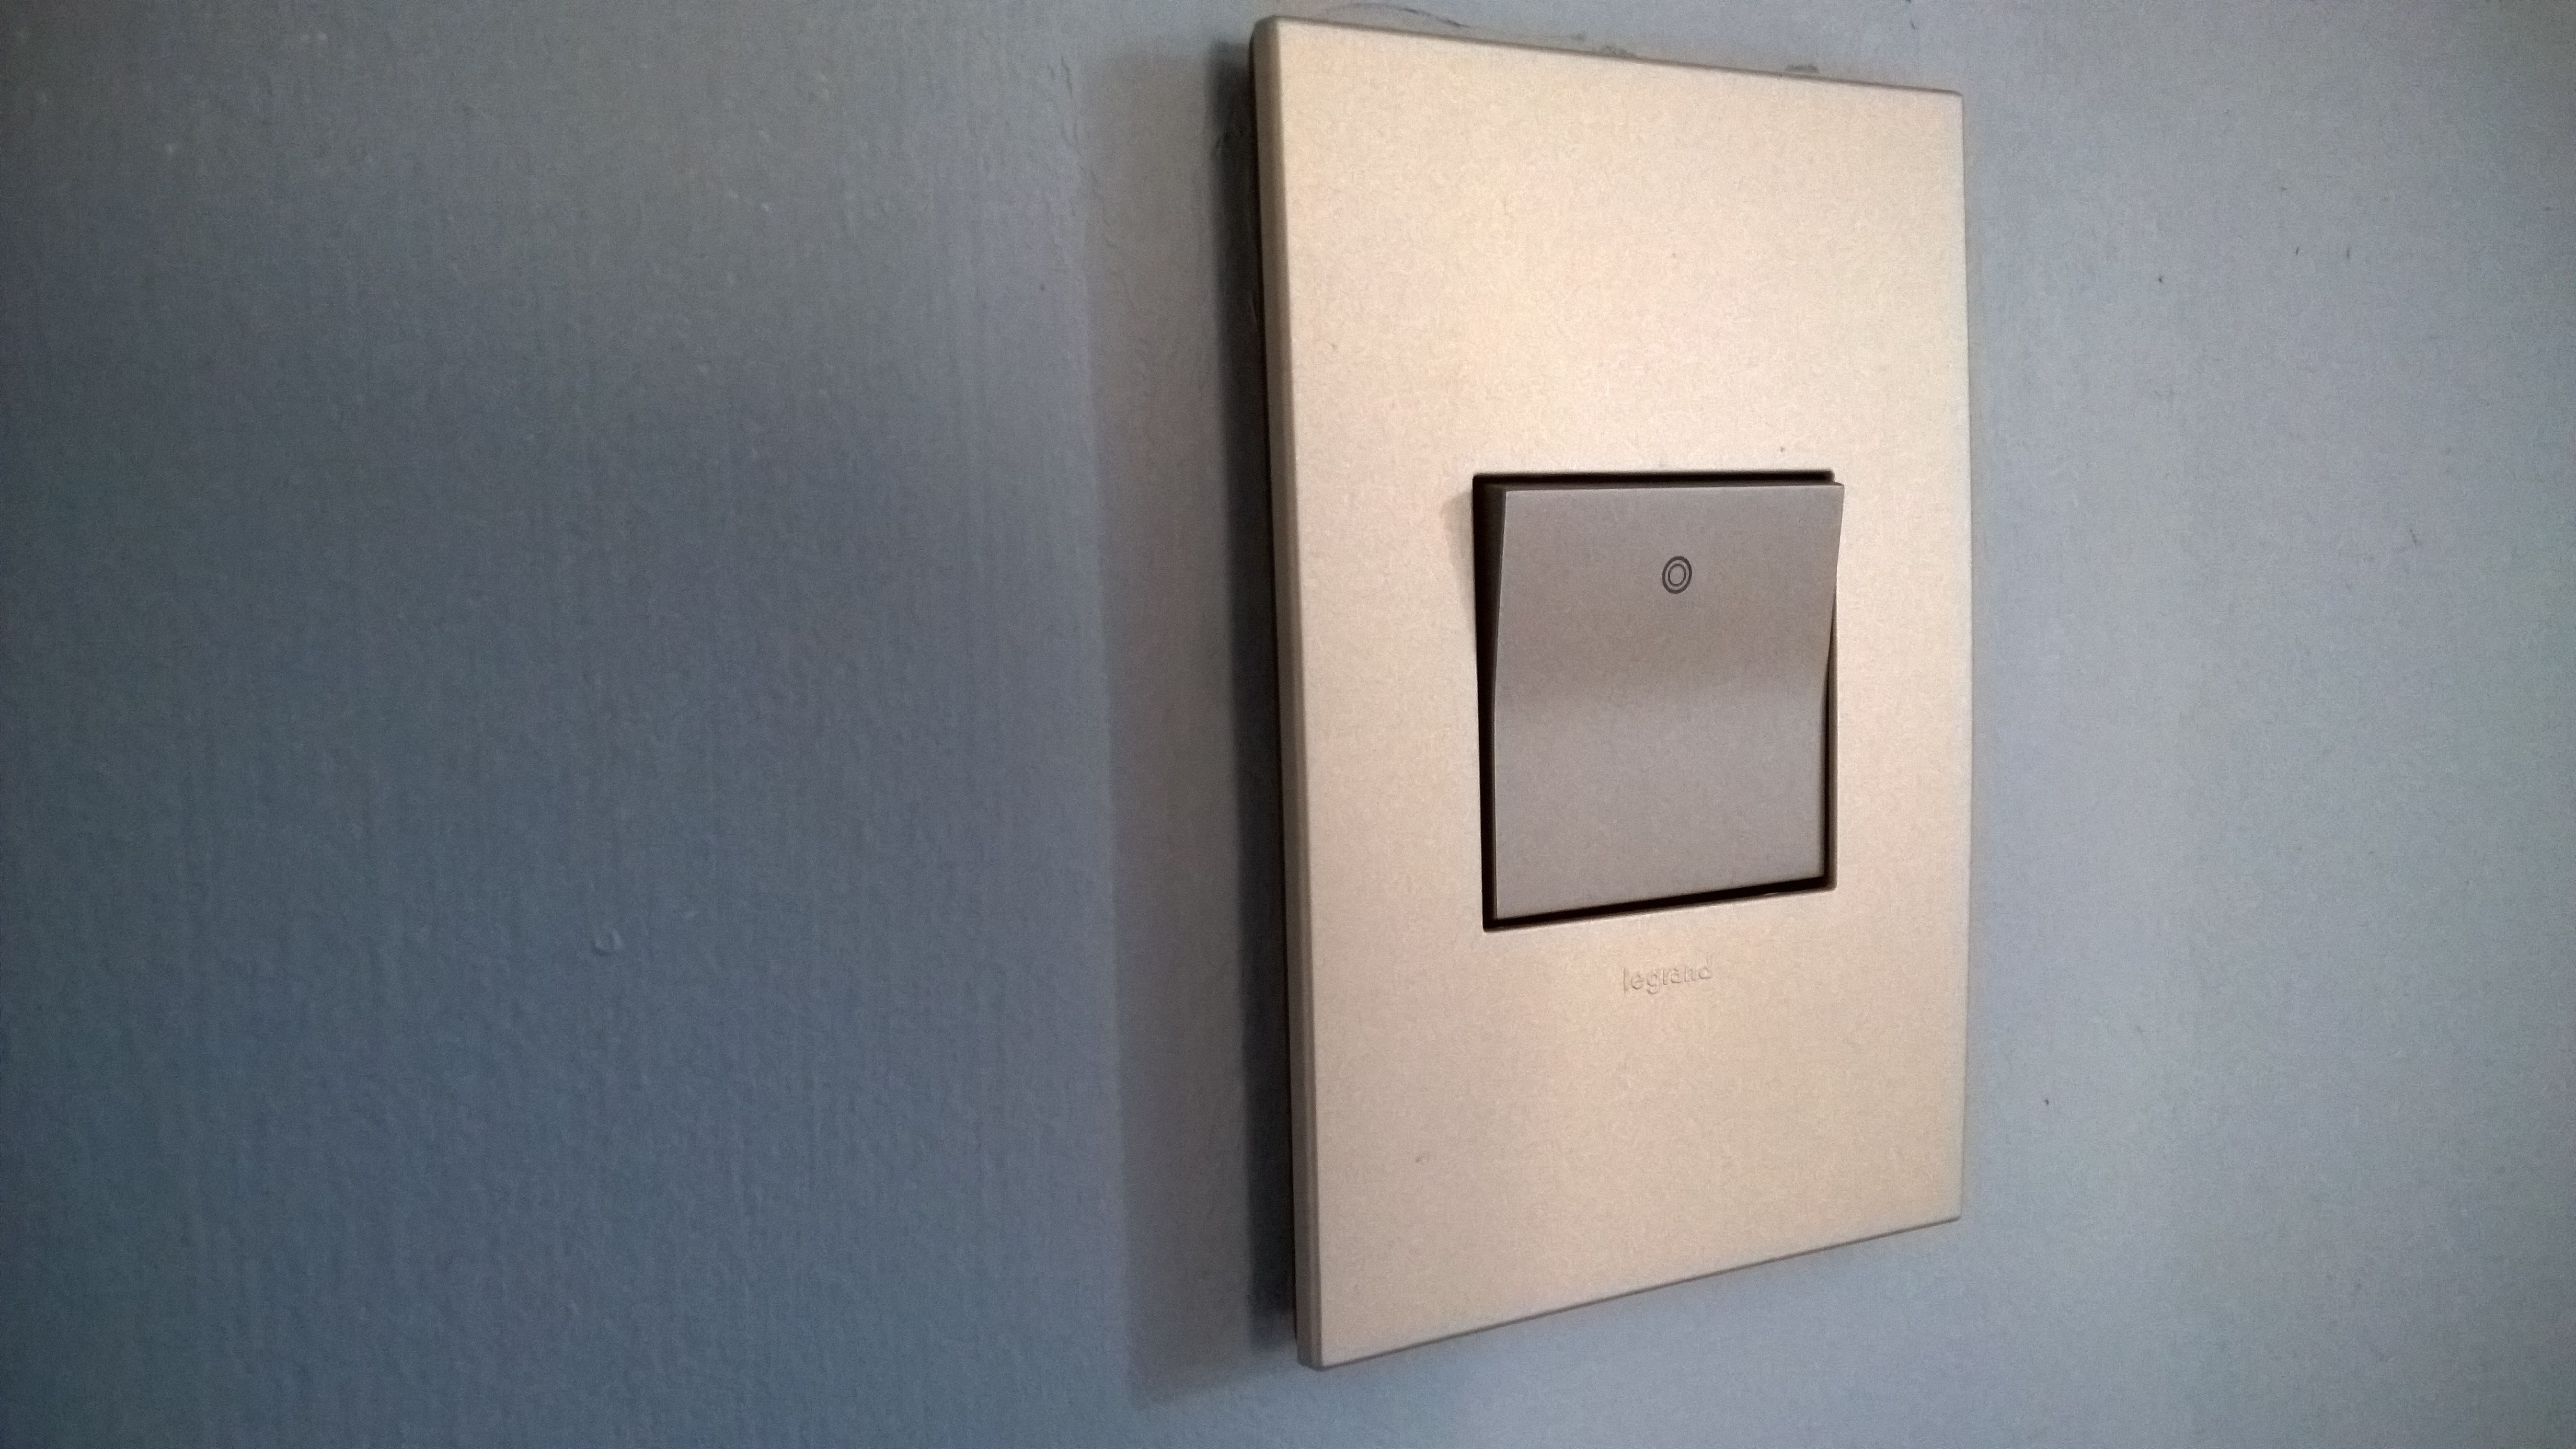
8. Switch the power back on from your breaker and enjoy your new Adorne Paddle switch and gang plate.


Review: Overall, I really like the Adorne system by Legrand. Be sure to check out their website for more options and solutions for anything from under cabinet lighting to cable management. You can spend as little as $10 or as much as $150 for a wall switch plate/electrical switch(or a dimmer/USB outlet/etc.) so there is something for everyone. I am pretty excited that this part of the room has taken on such a modern and finished look with only $13 spent. I look forward to investing in more Adore outlets and fixtures for the rest of the house.
I hope you enjoyed this article and look out for more DIY articles now that I have a new home to work on!